graph TD
    subgraph "Core Elements"
        A["Node <br> (A single point)"]
        B["Way <br> (A line or area from nodes)"]
        C["Relation <br> (A group of elements)"]
    end

    A -- "Forms" --> B
    B -- "Can be part of" --> C
    A -- "Can be part of" --> C

    style A fill:#f9f,stroke:#333,stroke-width:2px
    style B fill:#bbf,stroke:#333,stroke-width:2px
    style C fill:#9f9,stroke:#333,stroke-width:2px
OSM and UMAP
Collaborative Mapping and Map Visualization
Imron Rosyadi
Mapping and Editing OpenStreetMap
A Beginner’s Guide to Collaborative Cartography
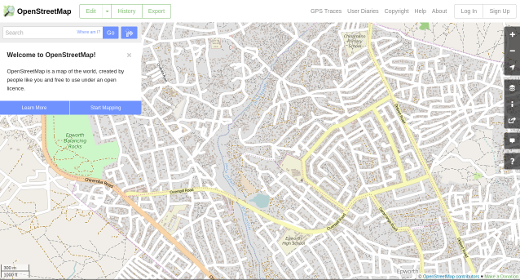
What is OpenStreetMap (OSM)?
- A collaborative, open-source project to create a free, editable map of the world.
- Often called the “Wikipedia for maps.”
- Built by a community of volunteers who contribute and maintain data.
- Data includes roads, trails, buildings, points of interest, and much more.
Note
OSM is not just a map; it’s a massive database of geographic information (geodata).
Core Elements of OSM Data
OSM data is built from three basic geometric elements.
Nodes: A single point in space, defined by latitude and longitude. Used for points of interest like trees or post boxes.
Ways: An ordered list of nodes that form a polyline or polygon. Used for linear features (roads, rivers) or areas (parks, buildings).
Relations: A group of nodes, ways, and other relations. Used for complex features, like a bus route (grouping stops and roads) or a building with a courtyard.
Map Features: The Power of Tags
Elements have no meaning until you tag them. Tags describe what a feature is.
Tag Structure: key=value
A tag consists of a key and a value.
key: The general category (e.g.,amenity).value: The specific type (e.g.,school).
Examples:
- A road:
highway=residential - A cafe:
amenity=cafeandname=The Daily Grind - A park:
leisure=park - A building:
building=yes
flowchart LR
    subgraph "A Cafe Feature"
        A(Node or Way)
        T1["key=amenity <br> value=cafe"]
        T2["key=name <br> value=The Daily Grind"]
        T3["key=cuisine <br> value=coffee_shop"]
    end
    A --> T1
    A --> T2
    A --> T3
Where to find tags?
The OSM Wiki is the ultimate guide for finding and using the correct tags for any feature. Always check it when in doubt!
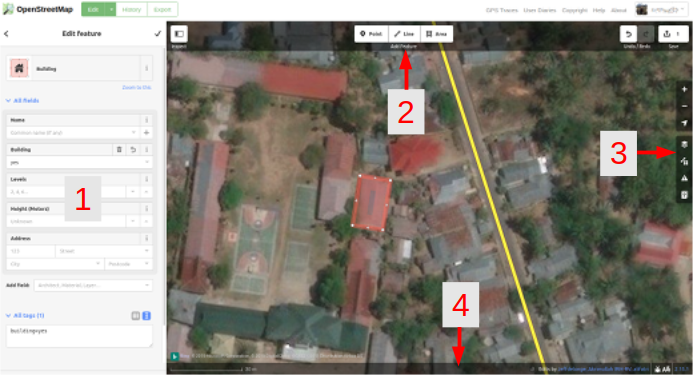
How to Edit OSM: Your Toolkit
There are many editors, but the easiest to start with is iD.
iD Editor (In-browser)
- The default, web-based editor on
openstreetmap.org. - User-friendly and perfect for beginners.
- Runs directly in your browser, no installation needed.
- Integrated help and walkthrough.
Alternative & Specialized Editors
For more advanced or specific tasks, other editors are available.
JOSM (Java OpenStreetMap Editor): A powerful desktop application. Preferred by experienced mappers for its plugins, validation tools, and ability to handle large datasets.
Rapid: Rapid is a fork of iD, developed by Meta. In addition to the Features of iD, Rapid offers tools to verify AI generated data and integrate it into the OSM database.
Mobile Editors: Great for on-the-ground surveying.
- StreetComplete: A gamified app for adding details to existing features.
- Every Door: Quickly add and edit shops and amenities.
- OSM Go!: A comprehensive mobile editor.
- Vespucci: A fully-featured Android editor.
Mapping Techniques
How do we gather the data to add to the map?
Armchair Mapping
Mapping done remotely from a computer.
- Sources:
- High-resolution aerial/satellite imagery.
- GPS traces uploaded by other users.
- Public domain data or street-level imagery (e.g., Mapillary).
- Best for:
- Tracing roads, buildings, and land use.
- Large-scale mapping projects.
Outdoor Mapping
Mapping done on-the-ground, in the field.
- Tools:
- GPS devices or smartphones with tracking apps.
- Field Papers (printed maps for annotation).
- Mobile editors like StreetComplete or Every Door.
- Best for:
- Capturing details not visible from above (e.g., shop names, opening hours, accessibility).
- Verifying existing data.
Visualizing the Mapping Workflow
Here is a simplified view of both armchair and field mapping.
graph TD
    subgraph "Armchair Mapping"
        A1[Open iD Editor] --> A2{Select Aerial Imagery};
        A2 --> A3[Trace a building or road];
        A3 --> A4[Add tags, e.g., `building=house`];
        A4 --> Z(Upload Changeset);
    end

    subgraph "Outdoor/Field Mapping"
        B1["Open Mobile App <br> (e.g., Every Door)"] --> B2{Walk down a street};
        B2 --> B3[Tap on a shop <br> and add its name];
        B3 --> B4[Add details like <br> opening hours];
        B4 --> Z;
    end
Uploading Your Changes
When you save your work, you upload a changeset to OSM.
Review Your Edits: Double-check the features you’ve added or modified.
Write a Changeset Comment: Briefly describe what you did and why. This is crucial for other mappers to understand your work.
- Good: “Added newly opened cafe on Main St based on survey.”
- Bad: “updates” or “fixed map”
Upload: Your contributions are now live on the map!
Your Edits are Public and Live!
Your changes are visible to everyone and become part of the live database. Be confident and careful with your edits. It’s okay to start small!
Beyond the Map: OSM Communities
OSM is more than data; it’s a global community with many specialized groups.
Humanitarian OSM Team (HOT)
- A global NGO that applies open mapping for humanitarian action and community development.
- Mappers create base maps of the world’s most vulnerable places.
- Crucial for disaster response.
![]()
Other Communities
- Global Healthsites Mapping Project: Focuses on mapping every health facility in the world.
- Local Chapters & Meetups: Groups of mappers in a specific city or country who collaborate and socialize.
- Thematic Groups: Mappers interested in public transport, accessibility, hiking trails, etc.
OSM Guide
Get Mapping!
You have the knowledge to start contributing.
- Create an account at openstreetmap.org.
- Run the built-in walkthrough in the iD editor.
- Start small: Add a park bench, a local shop, or correct a street name in an area you know well.
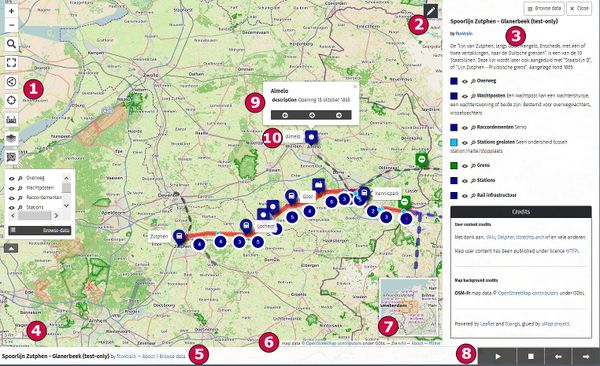
Creating Custom Maps with uMap
Visualize Your Data on OpenStreetMap Layers
What is uMap?
- An open-source tool to create custom, interactive maps quickly.
- It lets you place markers, lines, and polygons on top of various base maps, including OpenStreetMap.
- Your creations can be easily shared or embedded into a website.
- It’s perfect for visualizing custom datasets, planning routes, or creating thematic maps.
Warning
Important: uMap creates maps using OSM as a background. It does not edit the official OpenStreetMap database itself.
uMap in the Wild: Public Instances
uMap is open-source software that anyone can host. Here are two popular public instances.
umap.openstreetmap.fr A general-purpose and widely used instance hosted by the French OSM community. A great place to start.
umap.hotosm.org Hosted by the Humanitarian OpenStreetMap Team (HOT). Often used for projects related to disaster response, public health, and humanitarian aid.
Note
Maps created on one instance are not visible on another. Choose one and stick with it for your project.
The Anatomy of a uMap
Every uMap project is built from a clear hierarchy of components.
graph TD
    subgraph "Your Custom Map"
        A["Background Map <br> (e.g., OSM, Satellite)"]
        B("Layer 1 <br> e.g., Restaurants")
        C("Layer 2 <br> e.g., Parks")

        D{"Marker <br> (Point)"}
        E{"Polyline <br> (Line)"}
        F{"Polygon <br> (Area)"}

        A -- Serves as base for --> B
        A -- Serves as base for --> C
        B --> D
        B --> E
        C --> F
    end

    style A fill:#ddd,stroke:#333
    style B fill:#lightgreen,stroke:#333
    style C fill:#lightblue,stroke:#333
Level 1: Managing Your Map
These are the global settings that control your entire map.
Map Properties
- Title & Description: Give your map a name and context.
- Initial View: Set the default zoom level and center point.
Import Data (Global)
- Click the “Upload data” button (⬆️).
- Supports formats like
.geojson,.gpx,.kml, and.osm. - This will create a new layer for the imported data.
Permissions & Sharing
- Define who can see and edit your map.
- Secret Links: Generate unique URLs for anonymous viewers or contributors.
- Editors: Grant editing rights to specific OSM users.
- Embed Options: Get the
<iframe>code to place your map on a blog or website.
Level 2: Working with Layers
Layers are containers for your features. They help you organize and style data in bulk.
- Purpose: Group similar objects.
- Example: A layer for “Cafes,” another for “Bus Stops.”
- Layer Properties:
- Name: Rename the layer for clarity.
- Color: Set a default color for all features in the layer.
- Icon Shape/Symbol: Set a default icon for all markers.
- Data Management:
- Import: Add data directly into a specific layer.
- Export: Download just that layer’s data.
- Show/Hide: Toggle layer visibility on the map.
Tip
Organizing features into layers is key to creating a clean and understandable map, especially for complex projects.
Level 3: Objects - The Marker
A Marker represents a single point of interest (POI).
How to Create:
- Select the marker tool (📍) from the toolbar.
- Click on the map where you want to place the marker.
- The editing panel will open.
Key Properties:
- Name & Description: Add a title and detailed info. The description supports Markdown for formatting!
- Color: Override the layer’s default color.
- Icon Symbol: Choose a unique symbol to represent the feature.
Level 4: Objects - The Polyline
A Polyline is an ordered series of points connected to form a line.
How to Create:
- Select the polyline tool.
- Click on the map to add vertices (points).
- Double-click on the last point to finish drawing.
Use Cases:
- Roads, paths, or trails.
- Bus routes.
- River courses.
Key Properties:
- Name & Description
- Stroke Color & Width: Control the line’s appearance.
- Dash Style: Make it a solid, dashed, or dotted line.
Level 5: Objects - The Polygon
A Polygon is a closed shape used to represent an area.
How to Create:
- Select the polygon tool.
- Click to add vertices for the boundary.
- Click back on the first point to close the shape.
Use Cases:
- Park boundaries.
- Building footprints.
- Neighborhood zones or districts.
Key Properties:
- All polyline properties (stroke, etc.).
- Fill Color: The color inside the shape.
- Fill Opacity: How transparent the fill is.
uMAP Structure


uMap Guide
uMap Examples
Create Your Map!
uMap is an accessible yet powerful tool for custom cartography.
- Start your project at umap.hotosm.org.
- Experiment: Try importing a GPX track from a run or a list of your favorite local spots.
- Collaborate: Share the editor link with a friend and build a map together.
Mapping for Impact: KKN uMap Project
Community Service Projects with uMap in Indonesian Villages
Project Pages
The Goal: From Data to Action
Today, we’ll explore practical community service ideas for villages in Indonesia using uMap.
- We will focus on creating thematic maps that visualize specific community needs.
- These maps help village leaders, NGOs, and residents make better decisions.
- uMap is the perfect tool for this—it’s free, easy to use, and builds on top of OpenStreetMap data.
Note
Remember: uMap is for creating custom map layers. It does not edit the official OpenStreetMap database. It’s a visualization tool.
graph LR
    A[Community Need] --> B{Collect Data};
    B --> C[Create uMap];
    C --> D[Share Map];
    D --> E[Informed Action!];

    style A fill:#f9f,stroke:#333
    style E fill:#9f9,stroke:#333
Theme 1: Infrastructure & Governance
Mapping a village’s core assets helps with planning, maintenance, and administration.
“Peta Aset & Batas Desa”
- Public Facilities: Map schools, mosques, health posts (Posyandu), and the village office (Kantor Desa).
- Asset Maintenance: Track street lights, water pumps, and public toilets. Use colors to show status (e.g., Green for ‘Working’, Red for ‘Broken’).
- Community Boundaries: Draw polygons for Hamlet (Dusun) and Neighborhood (RT/RW) borders to reduce disputes.
Impact: Provides a visual dashboard for the village government to manage assets and plan budgets (Dana Desa).
Theme 1: Infrastructure & Governance (other ideas)
Village Infrastructure Mapping
- Map roads, paths, bridges, and public facilities (schools, mosques, health posts (posyandu), trash collection points).
- Highlight areas needing repair or improvement.
- Use layers to show accessibility for vehicles vs. foot traffic.
- Impact: Helps villagers navigate important facilities; supports village planning (perencanaan desa).
Theme 2: Safety & Environment
Visualizing risks and resources can save lives and protect the local environment.
“Desa Siaga Bencana & Lestari”
- Disaster Preparedness: Map flood-prone areas (rawan banjir), landslide zones, evacuation routes, and safe gathering points (titik kumpul).
- Water & Sanitation: Identify wells, public taps, and also areas with poor drainage or illegal waste dumps.
- Environmental Watch: Plot locations of riverbank erosion, illegal logging, or community reforestation projects.
Impact: Empowers the village disaster taskforce (Satgas) and supports public health campaigns (e.g., dengue fever prevention).
Tip
In the marker popups for evacuation points, add the contact number of the Hamlet Head (Kepala Dusun)!
Theme 2: Safety & Environment (other ideas)
Disaster Preparedness Maps
- Map flood-prone zones, landslide areas, or evacuation routes.
- Add safe shelters and community gathering points.
- Provide villagers with printed or mobile-accessible maps for emergencies.
Emergency Response Map (“Peta Tanggap Darurat Desa”)
- Map of: Fire-risk zones (rumah panggung, kebun kering), Nearest fire stations or call numbers, Evacuation routes, Open gathering spaces (lapangan, GOR), Landslide-prone areas (rawan longsor), Flood evacuation points
- Impact: Supports BPBD, village disaster taskforce (Satgas Bencana), and education for villagers.
Theme 2: Safety & Environment (other ideas)
Water & Sanitation Mapping
- Identify wells, water sources, and distribution points.
- Mark areas with poor sanitation or waste disposal sites.
- Help NGOs or local government prioritize clean water projects.
- Impact: Useful for sanitation programs, NGO water projects, and health campaigns.
Environmental & Biodiversity Mapping
- Plot forests, rivers, and biodiversity hotspots.
- Identify illegal logging or waste dumping areas.
- Support conservation efforts with visual evidence.
Waste Management & Environmental Map
- Map of: Illegal dumping sites (TPS liar), Flood-prone drainage, Reforestation locations (perhutanan sosial), Recycling points, Riverbank erosion areas
- Impact: Supports environmental policymaking and cleanup programs.
Theme 3: Economy & Livelihood
A map can be a powerful tool to boost the local economy and support farmers.
“Peta Ekonomi & Wisata Desa”
- Agriculture: Map land use (rice fields, gardens), irrigation channels, and farmer group locations.
- Local Business (MSME/UMKM): Plot home industries (e.g., snack producers), local cafes (warung), and workshops.
- Tourism: Highlight attractions like waterfalls, homestays, or cultural sites to create a digital tourist guide.
Impact: Promotes local products, supports farmer cooperatives, and helps develop sustainable village tourism (Desa Wisata).
Theme 3: Economy & Livelihood (other ideas)
Agricultural Resource/Productivity Mapping
- Plot rice fields, plantations, and irrigation channels.
- Map of:
- Land-use types (sawah, tegalan, kebun, hutan)
- Irrigation networks (saluran irigasi)
- Crop distribution (padi, jagung, kelapa, coklat)
- Locations of farmer groups (kelompok tani)
- Post-harvest facilities (rice mills, drying yards)
- Add layers for crop types and seasonal planting cycles.
- Support farmer cooperatives with shared knowledge of land use.
- Impact: Helps village farmers plan irrigation, farming schedules, and harvest logistics.
Tourism & Cultural Heritage Mapping
- Highlight local attractions (waterfalls, traditional houses, crafts).
- Map homestays or eco-tourism spots.
- Promote sustainable tourism that benefits the village economy.
Theme 3: Economy & Livelihood (other ideas)
Public Transportation & Accessibility Map
- Map all mobility information:
- Angkot routes
- Ojek bases
- Damri / shuttle pickup points
- Road quality (baik/sedang/rusak)
- Bridges and river crossings
- Walking paths and shortcuts used by villagers
- Impact: Useful for village infrastructure proposals and student mobility.
MSME & Local Economy Map
- Map all villagers’ economic activities:
- Home industries (keripik, tempe, gula aren)
- Fishing spots
- Warungs and kiosks
- Local tourism points (air terjun, kebun kopi)
- Cooperatives (koperasi desa)
- Impact: Promotes small businesses and tourism.
Theme 3: Economy & Livelihood (other ideas)
Household Survey Map (Participatory Mapping)
- Train villagers to add their own data:
- Poverty indicators (DTKS-friendly markers)
- Assistance recipients (PKH, BLT, BPNT)
- Flood history at each household
- Household electricity/water access
- Impact: Helps desa fulfill SDGs Desa and prepares for Musrenbangdes.
Theme 4: Social & Human Development
Mapping social data helps ensure that services reach the most vulnerable people.
“Peta Sosial & Pendidikan”
- Health Access: Map homes of the elderly or persons with disabilities to guide health visits. Visualize the distance from homes to the nearest clinic.
- Social Aid (Bansos): Use heatmaps to show concentrations of vulnerable households, ensuring aid is distributed fairly without revealing personal data.
- Education: Create a “safe routes to school” map, highlighting dangerous crossings or unlit paths. Map digital dead zones where students struggle with online learning.
Impact: Supports transparency in aid distribution and helps improve access to health and education for all residents.
Theme 4: Social & Human Development (other ideas)
Health & Social Services Mapping
- Map clinics, midwives, and traditional healers.
- Add data on vaccination points or maternal health services.
- Visualize underserved areas to guide outreach programs.
Education & Youth Engagement
- Map schools, libraries, and informal learning centers.
- Create a “safe routes to school” map for children.
- Involve students in data collection as a learning project.
Health Risk Map
- Identify:
- Dengue mosquito hotspots (jangka DBD)
- Waste accumulation spots
- Areas with poor drainage
- Home locations of elderly/disabled residents (for Posyandu Lansia)
- Distance heatmaps to nearest health service
- Impact: Supports Posyandu, Puskesmas, and public health efforts.
Theme 4: Social & Human Development (other ideas)
Educational Access Map
- Map:
- All schools and their student capacity
- Students’ walking paths to school
- Dangerous paths (no sidewalks, crossing rivers)
- Internet/Wi-Fi signal levels in different areas
- Community learning centers (PKBM, rumah belajar)
- Impact: Supports village education programs, proposals for safer roads.
Digital Connectivity Map
- Collect signal measurements using villagers’ phones:
- Telkomsel, XL, Indosat signal strength by location
- Wi-Fi hotspots (RT/RW Net, schools, warung)
- Dead zones (blank spots)
- Impact: Useful for proposing BTS towers, improving online schooling.
A Practical Workflow
From walking the village to sharing the final map.
- Collect data: Walk the village with GPS-enabled phones, record points of interest.
- Upload to uMap: Use categories (health, education, agriculture, etc.).
- Community workshops: Teach villagers how to read and contribute to maps.
- Share outputs: Print maps for local use, embed interactive maps on village websites or WhatsApp groups.
Start Your Project!
You have a powerful framework for making a real difference.
- Choose a theme that is most relevant to your target village.
- Engage the community: Talk to the village head and residents. Their input is essential.
- Start small: Don’t try to map everything at once. A well-made map of one theme is better than a messy map of ten.